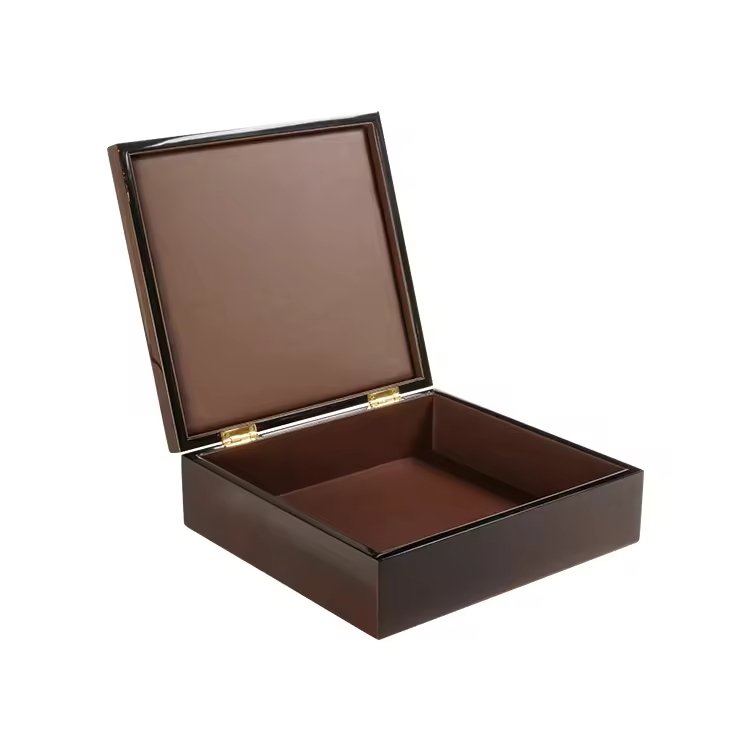
A premium watch box with a flawless, mirror-like finish can elevate your brand—but one with “orange peel” texture instantly looks less refined, even if the paint color is perfect.
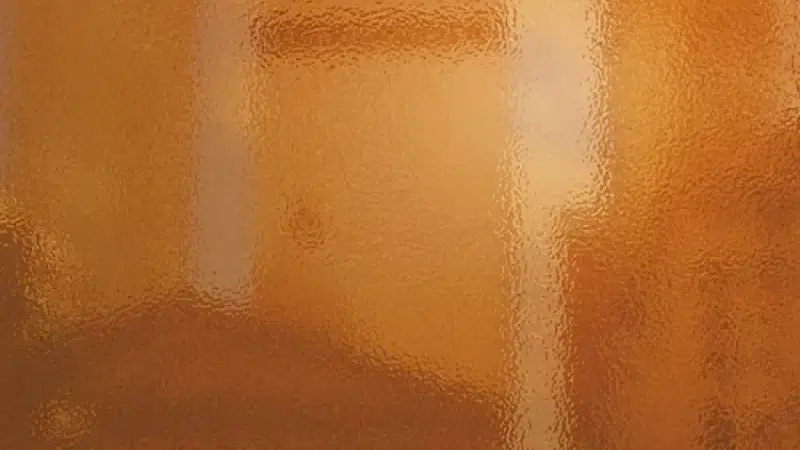
Orange peel is a surface defect caused by improper paint application, resulting in a bumpy or dimpled finish that reduces both gloss and perceived quality.
After years of painting luxury wooden boxes, I’ve seen how this issue can turn a high-end product into a reject. Here’s how to spot the causes—and fix them before they reach your customers.
What exactly is “orange peel” texture, and why is it a problem for luxury packaging1?
“Orange peel” refers to a paint surface that resembles the skin of an orange—slightly rippled, uneven, and lacking in mirror clarity.
This texture reflects light poorly and disrupts the sleek, polished aesthetic expected in premium packaging. It’s especially noticeable on:
- High-gloss finishes
- Dark-colored boxes (black, navy, deep red)
- Flat panel surfaces like watch box lids
Why It’s a Problem:
- Reduces perceived quality
- Affects brand image of attention to detail
- Increases rework rates
- Worsens over time if not properly cured
| Finish Type | Sensitivity to Orange Peel |
|---|---|
| Gloss PU | Very High |
| Matte PU | Moderate |
| UV High Gloss | Very High |
| NC Lacquer | High |
✔ A small amount of orange peel2 may go unnoticed on matte finishes—but on piano gloss? It’s a dealbreaker.
How do spray gun settings3 and technique contribute to surface irregularities?
Incorrect spray setup is one of the most common causes of orange peel. Even with perfect paint, poor atomization4 creates droplets that sit unevenly on the surface.
Key Causes from Spray Technique:
- Low air pressure: Paint doesn’t atomize finely, causing texture
- High material flow: Too much paint builds up and doesn’t level
- Improper distance from surface: Too close = heavy build-up; too far = dry spray
- Spraying too fast or slow: Inconsistent overlap or pooling
Ideal Spray Gun Settings (PU Paint):
| Setting | Recommended Range |
|---|---|
| Air Pressure | 2.0–2.5 bar (30–35 psi) |
| Nozzle Size | 1.3–1.5 mm |
| Fan Width | Medium to Wide |
| Distance to Surface | 15–20 cm |
✔ Use consistent spray speed and cross-hatch passes for even coverage.
On one black gloss watch box run, we discovered the spray tech was holding the gun too close—resulting in heavy, textured buildup. A simple distance correction solved 80% of the issue.
Can paint viscosity5 and mixing errors lead to orange peel effects?
Yes—paint that is too thick won’t flow or level properly, especially on vertical surfaces like watch box sides.
Common Mixing Mistakes:
- Not thinning enough: High-viscosity paint won’t level before it starts curing
- Inconsistent mixing: Flattening agents or pigments can clump
- Wrong hardener-to-resin ratio: Affects cure speed and flow
- Using expired materials: Causes gelling or separation
Ideal Paint Viscosity (PU):
- 15–18 seconds in a Ford #4 cup (at 25°C)
- Adjust based on humidity and spray setup
| Mixing Error | Orange Peel Risk |
|---|---|
| Too thick | High – doesn’t level |
| Too thin | Low – but may run/sag |
| Uneven mixing | High – inconsistent flow |
✔ Always use a viscosity cup and scale—don’t eyeball it.
After one batch had noticeable texture variation, we traced it back to a new worker skipping the viscosity check. Once we standardized all mixing with digital timers and measurement tools, the problem stopped.
How do temperature and humidity6 in the workshop impact paint leveling?
Environmental conditions affect how fast paint dries—and how well it levels before it sets.
If the Air Is Too Warm:
- Paint flashes (dries) too quickly → surface texture locks in
- Reduces open time for leveling7
If the Air Is Too Humid:
- Moisture can cause blushing8 or uneven surface curing
- Can affect mixing ratio accuracy for water-reactive materials
| Factor | Recommended Range |
|---|---|
| Temperature | 20–26°C (68–78°F) |
| Humidity | 45–65% RH |
✔ Use slower-drying thinners or retarders in hot or dry conditions.
We had an orange peel issue during a summer heatwave. The solution wasn’t the paint—it was adding 5% retarder and slightly increasing spray distance. That gave the paint time to flow.
What role does surface preparation9 and sanding play in final smoothness?
The smoother your surface before painting, the better your finish. Uneven sanding10, dust, or sealed grain can all prevent paint from settling evenly.
Key Steps:
- Sand to 320–400 grit before basecoat
- Seal open-grain woods (oak, ash) with grain filler11 or sanding sealer
- Clean all dust and oil using tack cloth and compressed air
- For piano lacquer: sand between every coat with ultra-fine (600–800 grit)
| Prep Error | Resulting Defect |
|---|---|
| Uneven surface | Paint settles inconsistently |
| Residual dust | Trapped particles under finish |
| No grain sealing | Textured absorption patterns |
✔ Always use proper lighting to check surface uniformity before spraying.
We once missed a sanding step between primer and color coat on a batch of maple boxes. The surface looked bumpy after gloss topcoat—classic orange peel from poor prep.
How can you fix or prevent orange peel texture during or after painting?
Prevention is always better, but if you catch orange peel early, there are recovery options.
During Production:
- Adjust gun settings and viscosity immediately if texture appears
- Stop batch spraying to correct technique—don’t “spray through” issues
- Use slower thinner or adjust temperature if paint flashes too fast
After Drying:
- Wet sanding with 1200–2000 grit can flatten orange peel
- Buffing with compound restores gloss after sanding
- Recoat if texture is too deep or widespread
| Fix Option | When to Use |
|---|---|
| Wet sand + buff | Minor peel on cured surface |
| Respray topcoat | Peel on final coat, not base |
| Strip + repaint | Deep peel through multiple layers |
✔ Always wait 24–48 hours before sanding to ensure proper curing.
For one customer’s 300-piece gloss walnut line, we caught orange peel on 20 boxes. Wet-sanded, re-topcoated, and buffed—all were saved. No client complaints.
Conclusion
Orange peel may seem like a minor surface flaw—but for a high-end watch box, it’s a serious mark against quality. The good news? It’s preventable with the right process and attention to detail.
To avoid orange peel in luxury box painting:
- Tune your spray setup—correct pressure, distance, and flow
- Control paint viscosity with proper mixing and measurement
- Maintain ideal workshop temperature and humidity
- Prepare the surface carefully, sealing grain and sanding evenly
- Spot problems early and fix them before topcoat curing
Because when your finish is smooth as glass, your product speaks luxury before the lid even opens.
Brand Name: WoodoBox
Slogan: Custom Wooden Boxes, Crafted to Perfection
Website: www.woodobox.com
-
Luxury packaging plays a vital role in brand perception and customer experience. Discover insights on its significance by following this link. ↩
-
Understanding orange peel texture is crucial for maintaining the quality and aesthetics of luxury packaging. Explore this link to learn more. ↩
-
Exploring the best spray gun settings can significantly improve your painting results and minimize defects like texture and unevenness. ↩
-
Learning about atomization will enhance your painting technique, ensuring a finer finish and reducing surface irregularities. ↩
-
Understanding paint viscosity is crucial for achieving a flawless finish. Explore this link to learn more about its impact on painting results. ↩
-
Temperature and humidity play a vital role in paint application. Learn how to optimize these conditions for the best results. ↩
-
Open time is essential for achieving a flawless paint job. Discover more about its significance and how to manage it effectively. ↩
-
Understanding blushing is crucial for achieving a smooth finish in painting. Explore this link to learn more about its causes and solutions. ↩
-
Understanding surface preparation is crucial for achieving a flawless paint finish. Explore this link to enhance your painting skills. ↩
-
Sanding is vital for a smooth finish. Discover expert insights on how proper sanding techniques can elevate your painting results. ↩
-
Grain filler plays a key role in achieving a smooth surface. Learn more about its benefits and application techniques. ↩