Skip to content

Glossy finishes look luxurious—but one wrong move during assembly can scratch, haze, or dull them permanently.
To avoid surface damage, I always follow a sequenced assembly process: cure fully, wrap with care, install interior last, and handle with protective tools at every step.
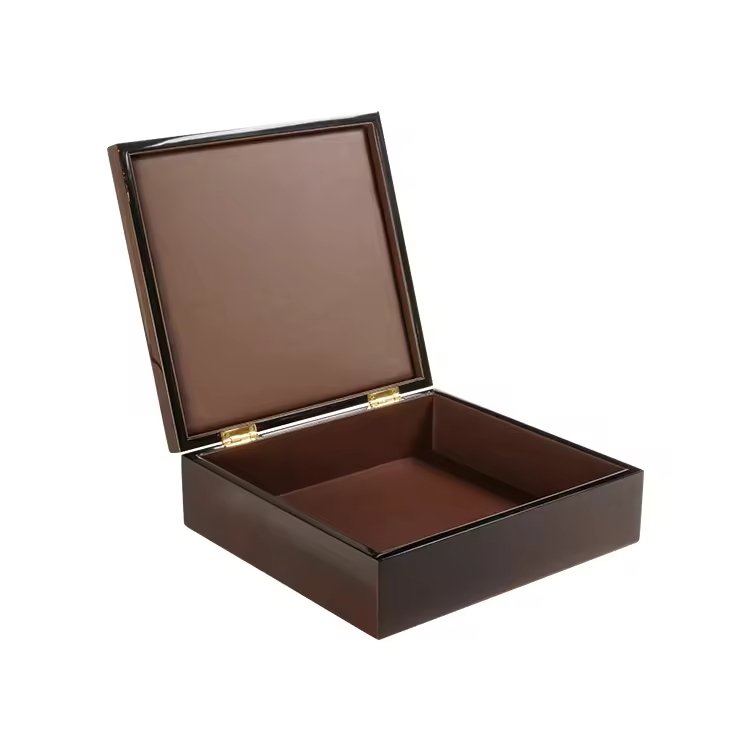
Over years of making high-gloss perfume boxes, I’ve learned that beauty alone isn’t enough—it has to last through production, shipping, and display. Here's how I reduce risks at every stage of assembly.
Why are glossy finishes1 more vulnerable during the assembly process?
Glossy surfaces—especially piano lacquer2 or polyurethane—are like mirrors: they reflect everything, including mistakes.
Key vulnerabilities:
- Micro-scratches from fingernails, tools, or dry cloth
- Smudging or hazing from skin oils or adhesives
- Cracks or dents from pressure at corners or joints
- Dust contamination trapped during late-stage assembly
| Glossy Finish Type | Common Risks |
|---|---|
| Piano lacquer | Hairline scratches, dust pinholes |
| PU gloss | Smearing, pressure dents |
| UV coating | Static dust attraction, brittle edges |
✔ Once damaged, glossy coatings are hard to rework—prevention is everything.
What protective measures should be in place before handling high-gloss components?
Before touching anything gloss-finished, I set up a damage-control environment.
My standard protections:
- Use nitrile gloves3 to avoid skin oils
- Place microfiber mats4 or anti-scratch foam on all workbenches
- Store glossed parts vertically in foam-lined racks, never stacked
- Designate "clean hands only" zones for final-stage handling
- Use low-tack films5 to protect gloss during earlier assembly phases
| Protective Step | Benefit |
|---|---|
| Nitrile gloves | No fingerprints or skin residue |
| Foam mats | Prevents accidental sliding or marring |
| Anti-static blowers | Keeps airborne dust off coated surfaces |
✔ Treat each glossy panel as a finished product—not just a work-in-progress.
How can you sequence internal lining, exterior wrapping, and final assembly to minimize scratches?
The correct sequence can eliminate most unnecessary contact with glossy surfaces.
Recommended Sequence:
- Full exterior finishing first – ensure lacquer or paint is cured 100%
- Protect with removable film6 on critical surfaces
- Install internal linings or foam trays7 next
- Assemble hinges, magnets, or closures while using jigs to avoid pressure
- Final wipe-down and protective packing only after full inspection
| Assembly Stage | Surface Risk Level | Protection Priority |
|---|---|---|
| Lining installation | Low | Use soft inserts/tools |
| Hinge installation | Medium | Use torque-limited tools |
| Exterior polishing | High | Gloves + microfiber only |
✔ Don’t peel protective film until seconds before packing—that’s my golden rule.
What tools and fixtures reduce contact points during assembly?
I never trust a flat bench when dealing with gloss finishes.
Smart tooling ideas:
- Custom soft jigs8 made from EVA foam or felt-wrapped wood
- Use non-slip silicone pads9 instead of clamps for light pressure
- Design corner guides with clearances that avoid friction contact
- Use vacuum fixtures10 for component positioning without mechanical hold
- Incorporate slide-in trays for internal assemblies rather than pushing with fingers
| Tool Type | Scratch-Prevention Feature |
|---|---|
| EVA clamp jaws | No surface compression or scuffing |
| Silicone trays | Cradles without pressure points |
| Foam jigs | Precision with minimal contact |
✔ I've had jigs lined with flocking velvet before—anything to protect that mirror finish.
How does drying or curing time of coatings affect timing of the next steps?
One of the most common mistakes I see is rushing assembly after coating11.
Key considerations:
- Piano lacquer requires 72+ hours curing, even if touch-dry earlier
- UV finishes harden instantly under light, but surface tension can remain for 24 hours
- PU coatings remain soft underneath12 for 48–72 hours depending on humidity
- Always confirm full cure with fingernail resistance test or gloss meter reading13
| Coating Type | Safe Handling Time (min) | Full Cure Time (hrs) |
|---|---|---|
| UV Gloss | 15–30 mins | 12–24 hours |
| PU Gloss | 4–6 hours | 48–72 hours |
| Piano Lacquer | 12–24 hours | 72–96 hours |
✔ Early assembly may not leave visible marks—but they’ll appear weeks later as dull spots or impressions.
What quality control practices help catch surface defects early in the process?
I always have a second set of eyes (and lights) before packaging.
My QC checklist:
- Use angled inspection lights14 to reveal scratches and haze
- Do a final microfiber wipe15 to check for smudges or oil
- Test open-close action to ensure no rubbing or misalignment
- Inspect internal corners and edges for glue squeeze-out or dust
- Photograph each box for client records and issue tracking
| QC Tool | Detection Function |
|---|---|
| Gloss meter | Measures uniformity of surface shine |
| LED side light bar | Shows swirl marks and fine scratches |
| White cotton gloves | Reveal dirt transfer from surfaces |
✔ The more luxurious the product, the more microscopic the inspection needs to be16.
Conclusion
Glossy perfume boxes are a luxury statement—but only if they arrive flawless.
To reduce surface damage risks during assembly:
- Cure coatings completely before any mechanical work
- Handle only with gloves and soft mats
- Sequence assembly from least to most invasive steps
- Use jigs, vacuum holds, and custom padding to eliminate pressure points
- Run pre-packaging QC under inspection lighting to catch the unseen flaws
Because when your product is destined for the top shelf, even a fingerprint can become a flaw.
Brand Name: WoodoBox
Slogan: Custom Wooden Boxes, Crafted to Perfection
Website: www.woodobox.com
-
Understanding the vulnerabilities of glossy finishes can help in preventing damage during assembly, ensuring a flawless final product. ↩
-
Learning about the specific risks of piano lacquer can help in choosing the right techniques to avoid damage during assembly. ↩
-
Explore the advantages of nitrile gloves in protecting glossy surfaces and preventing damage during handling. ↩
-
Learn how microfiber mats can prevent scratches and damage to high-gloss surfaces, ensuring their pristine condition. ↩
-
Discover how low-tack films safeguard glossy components during assembly, maintaining their quality and finish. ↩
-
Explore this link to discover the most effective removable films that can safeguard your surfaces during assembly, ensuring a scratch-free finish. ↩
-
Learn how internal linings and foam trays can enhance protection and organization during assembly, minimizing the risk of damage. ↩
-
Explore how custom soft jigs can enhance your assembly process by reducing contact points and protecting finishes. ↩
-
Discover how non-slip silicone pads can replace clamps and reduce the risk of damage during assembly. ↩
-
Learn about the advantages of vacuum fixtures in positioning components without mechanical hold, ensuring precision and safety. ↩
-
Understanding the consequences of rushing assembly can help you avoid costly mistakes and ensure a quality finish. ↩
-
Discover the science behind PU coatings to better manage your project timelines and avoid premature handling. ↩
-
Learn how to accurately test the cure of your coatings to ensure optimal results and avoid future issues. ↩
-
Explore how angled inspection lights can enhance your quality control process by revealing hidden defects effectively. ↩
-
Learn about the importance of a final microfiber wipe in ensuring a flawless finish and preventing smudges. ↩
-
Discover why microscopic inspection is crucial for maintaining high standards in luxury product quality control. ↩