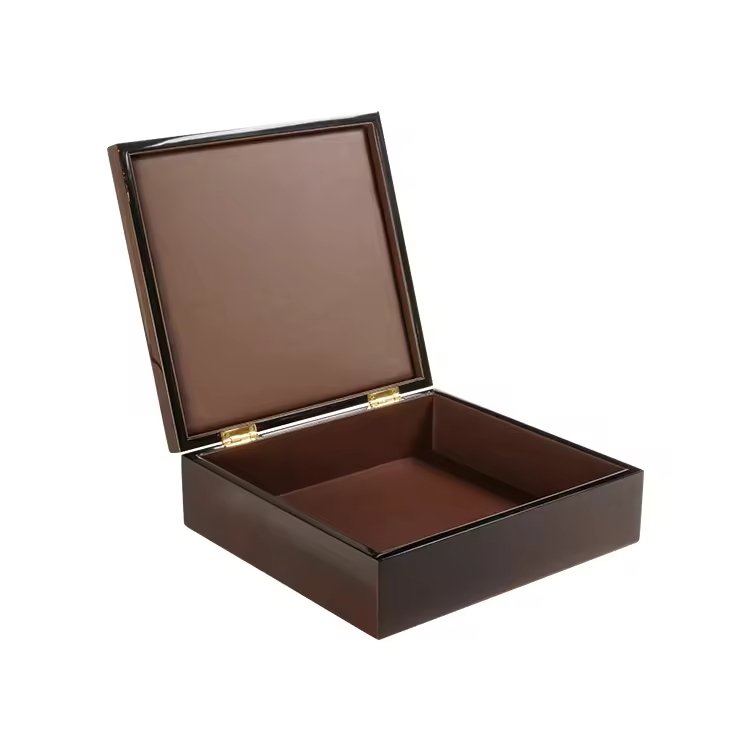

Nas embalagens de jóias de luxo, o acabamento da superfície diz muito. Mas por detrás desse brilho impecável está um processo que muitos ignoram - a cura da tinta. Não se trata apenas de secar; trata-se de manter a beleza e a durabilidade.
O tempo de cura afecta diretamente o brilho, a textura, a durabilidade e até a estabilidade da cor - especialmente em caixas de jóias de madeira de alta qualidade.
Ao longo dos anos, aperfeiçoei técnicas de cura para vários sistemas de revestimento. Aqui está o que aprendi sobre como o tempo faz toda a diferença.
Porque é que o tempo de cura adequado é fundamental para obter um resultado impecável? acabamento da superfície1?
A cura é a processo químico2 em que o revestimento se transforma de um líquido ou semi-sólido numa película endurecida e durável.
Sem cura completa:
- O acabamento pode permanecer macio e suscetível de ser danificado
- Os níveis de brilho podem parecer irregulares ou turvos
- A adesão à camada de base pode enfraquecer com o tempo
Com uma cura correta:
- A superfície atinge um toque suave, semelhante ao vidro
- O efeito brilhante ou mate estabiliza-se uniformemente
- A durabilidade e a resistência aos riscos atingem um desempenho ótimo
| Resultado da cura | Efeito visual | Comportamento da superfície |
|---|---|---|
| Totalmente curado | Brilhante, uniforme, suave | Duro, resiliente, polível |
| Subcurado | Nublado, pegajoso, inconsistente | Suave, propenso a impressões digitais |
| Sobrecurado | Aspeto quebradiço ou fissurado | Maior risco de lascar |
Já vi belos acabamentos de laca para piano ficarem baços ou racharem com o tempo simplesmente porque tempo de cura3 foi apressado ou inconsistente.
Que problemas podem ocorrer se a tinta for mal curado4 ou sobrecurado em caixas de jóias?
Uma cura deficiente conduz a defeitos de acabamento5 que podem aparecer imediatamente - ou pior, depois de a caixa ter sido entregue ao cliente.
Problemas de subpolimerização:
- A superfície permanece pegajosa ou macia
- Os níveis de brilho parecem pouco intensos
- O acabamento pode levantar-se ou enrugar-se
- O pó e as partículas incrustam-se facilmente
Problemas de cura excessiva:
- O revestimento torna-se frágil
- As extremidades lascam durante o manuseamento ou o transporte
- As fissuras de tensão formam-se com pequenos movimentos da madeira
- A cor pode amarelar ou mudar com o tempo (especialmente com PU)
| Erro de cura | Impacto no produto final |
|---|---|
| Subcurado | Fraca sensibilidade ao toque, propenso a danos |
| Sobrecurado | Instabilidade estrutural, defeitos estéticos |
Num trabalho urgente para uma feira comercial, um cliente solicitou um prazo de entrega ultrarrápido. No início, o acabamento parecia ótimo, mas, passados alguns dias, apareceram pequenas fissuras perto das dobradiças devido a demasiado curado6 laca. Tivemos de refazer todo o lote.
Como é que os diferentes tipos de tinta (PU, NC, UV) exigem abordagens de cura diferentes?
Cada sistema de revestimento tem a sua própria química e cronologia. Compreender estas diferenças é fundamental para controlar o processo de cura.
Revestimento de PU (poliuretano)7
- Cura por reação química com a humidade do ar
- Requer 4-24 horas por demão, consoante a fórmula
- Necessita de cuidados controlo da temperatura e da humidade
- A lixagem entre demãos é essencial para a aderência
Revestimento NC (Nitrocelulose)8
- Seca por evaporação do solvente
- Secagem rápida da superfície, mas necessita de dias para curar completamente no interior
- Recomenda-se a aplicação de camadas finas para evitar fissuras
- Menos durável do que o PU se não estiver totalmente curado
Revestimento UV9
- Curas instantaneamente sob luz UV
- Requer uma exposição exacta à energia (potência da lâmpada, velocidade)
- Não é necessário esperar muito tempo para curar, mas os pontos não curados permanecem pegajosos
- Ideal para painéis planos e necessidades de alto brilho
| Tipo de revestimento | Tempo de cura | Riscos comuns em caso de utilização incorrecta |
|---|---|---|
| PU | 8-24 horas | Bolhas, lascas nos bordos |
| NC | 12-48 horas | Encolhimento, fissuração |
| UV | Segundos | Remendos não curados, má aderência |
O PU oferece a melhor profundidade e dureza quando curado lenta e uniformemente
A NC é mais suave, mas não tem a durabilidade da PU
A UV é rápida mas implacável - sem margem para erros
Que factores ambientais (temperatura, humidade) afectam a consistência da cura?
A cura é fortemente influenciada pelo ambiente circundante. Condições instáveis podem causar resultados desiguais - mesmo com a mesma tinta e tempo.
Factores-chave:
- Temperatura: O frio atrasa a cura; o calor excessivo acelera-a de forma desigual
- Humidade: O PU depende da humidade para curar; uma quantidade insuficiente ou excessiva provoca defeitos
- Fluxo de ar: Uma boa circulação ajuda os revestimentos à base de solventes a curar uniformemente
- Controlo de poeiras: Evita que as imperfeições se fixem na superfície durante a secagem lenta
| Fator ambiental | Gama ideal para PU/NC |
|---|---|
| Temperatura10 | 20-28°C (68-82°F) |
| Humidade11 | 50-65% RH |
| Fluxo de ar12 | Suave, filtrado |
| Níveis de poeira | Sala limpa ou cabina isolada |
Criámos salas de cura dedicadas com sensores de temperatura e humidade para manter as condições consistentes em todas as estações. É assim que evitamos o amarelecimento no verão e as fissuras no inverno.
Como é que a cura afecta a durabilidade a longo prazo e estabilidade da cor13 do acabamento?
A cura não influencia apenas o aspeto imediato - determina a forma como o acabamento se mantém ao longo do tempo.
Benefícios de uma cura correta:
- Aumento dureza da superfície14 e resistência aos riscos
- Melhoria da aderência à madeira ou às camadas de primário
- Níveis de brilho ou de mate estáveis durante meses/anos
- Resistência aos raios UV15 e proteção contra o amarelecimento (com aditivos)
Riscos de uma cura deficiente:
- Desbotamento ou descoloração prematura
- O acabamento torna-se quebradiço, descasca-se
- A humidade infiltra-se nas camadas não curadas causando bolhas
| Qualidade do acabamento métrico | Curado corretamente | Cura incorrecta |
|---|---|---|
| Resistência aos riscos | Elevado | Baixa |
| Estabilidade da cor | Atualizado | Desvanece-se ou amarelece |
| Retenção do nível de brilho | Consistente | Enfraquece com o tempo |
| Adesão de superfície | Forte | Tendência para descascar |
Para PU e NC, efectuamos sempre um teste de resistência a riscos e a solventes após a cura
Para os raios UV, verificamos cada painel à luz para garantir que ocorreu uma exposição total
Um dos nossos clientes de longa data armazena inventário não vendido durante anos. Adaptámos o nosso processo de cura especificamente para evitar qualquer amarelecimento ou degradação do brilho ao longo do tempo.
Quais as melhores práticas que garantem resultados de cura consistentes na produção em grande escala?
Aumentar a produção não deve significar sacrificar a qualidade. Sistemas, testes e controlo de lotes adequados são essenciais para resultados repetíveis e de alta qualidade.
Melhores práticas:
- Utilizar um sala de cura dedicada16 com temperatura e humidade controladas
- Etiquetar e rastrear cada lote revestido com data, hora e iniciais do operador
- Testar o nível de brilho e a aderência num painel de referência de cada lote
- Utilizar temporizadores e sensores digitais para acompanhar o progresso da cura
- Deixar curar completamente antes de embalar-mesmo que a superfície esteja seca
| Passo de controlo da cura | Porque é que é importante |
|---|---|
| Registo em lote | Identificar os problemas até às causas de base |
| Controlo ambiental | Evitar incoerências sazonais |
| Teste de painel | Apanhar pontos mal curados ou irregulares |
| Esperar antes de manusear | Evita impressões digitais ou amolgadelas |
Sobrestimar sempre o tempo de cura em vez de apressar a produção
Manter um arquivo de amostras físicas de acabamentos totalmente curados para referência
Mantemos uma "parede de referência" na nossa sala de acabamentos - amostras reais de todos os principais clientes, mostrando como deve ser um acabamento perfeito e totalmente curado. Os novos operadores verificam-no todos os dias.
Conclusão
A cura é o passo invisível que torna possível a qualidade visível. Sem ela, mesmo a melhor tinta não conseguirá oferecer um desempenho de luxo.
Assegurar a qualidade do acabamento das caixas de jóias:
- Compreender o seu sistema de revestimento - PU, NC ou UV - e as suas necessidades de cura
- Controlo das condições ambientais: temperatura, humidade e fluxo de ar
- Teste cada lote para verificar o brilho, a dureza e a aderência
- Não apresse o processo - deixe o tempo de cura completo antes de lixar ou embalar
Porque no mundo das embalagens de luxo, a perfeição da superfície não é opcional - é a expetativa. E essa expetativa começa com a cura correta.
Nome da marca: WoodoBox
Slogan: Caixas de madeira personalizadas, fabricadas na perfeição
Sítio Web: www.woodobox.com
-
A exploração deste tópico fornecerá informações sobre como obter o melhor acabamento de superfície para os seus revestimentos. ↩
-
Aprender sobre o processo químico de cura pode aumentar o seu conhecimento sobre a durabilidade e o desempenho do revestimento. ↩
-
Compreender o significado do tempo de cura pode ajudá-lo a obter um acabamento impecável nos seus projectos. ↩
-
Compreender os efeitos de uma tinta mal curada pode ajudá-lo a evitar erros dispendiosos nos seus projectos. Explore esta ligação para obter informações pormenorizadas. ↩
-
A identificação precoce de defeitos de acabamento pode poupar tempo e recursos. Esta ligação fornece informações essenciais para melhorar as suas técnicas de acabamento. ↩
-
Saiba mais sobre os potenciais problemas causados pela tinta demasiado curada para garantir a qualidade e a durabilidade das suas caixas de jóias. Este recurso é inestimável. ↩
-
Explore esta ligação para compreender os requisitos específicos de cura e as melhores práticas para revestimentos de PU, garantindo resultados óptimos. ↩
-
Saiba mais sobre o processo de cura e os potenciais riscos dos revestimentos NC para evitar erros comuns e obter melhores acabamentos. ↩
-
Descubra as vantagens e os métodos de cura precisos dos revestimentos UV para maximizar a eficiência e a qualidade dos seus projectos. ↩
-
Compreender a temperatura ideal para a cura pode ajudar a obter melhores resultados e a evitar defeitos nos seus projectos. ↩
-
A exploração do impacto da humidade na cura pode fornecer informações sobre a obtenção de resultados óptimos e a prevenção de defeitos. ↩
-
Aprender sobre o papel do caudal de ar pode melhorar a sua compreensão sobre como obter uma cura uniforme e acabamentos de alta qualidade. ↩
-
Compreender a estabilidade da cor é crucial para manter a atração estética dos acabamentos ao longo do tempo. Explore esta ligação para obter informações aprofundadas. ↩
-
A dureza da superfície é fundamental para a durabilidade. Saiba mais sobre os seus efeitos na longevidade e no desempenho do acabamento. ↩
-
A resistência aos raios UV é vital para evitar o desvanecimento e a degradação. Saiba mais sobre a sua importância nas aplicações de acabamento. ↩
-
Explore a forma como uma sala de cura dedicada pode melhorar o controlo de qualidade e a consistência dos processos de produção. ↩