Conseguir un acabado de laca de piano impecable y sin burbujas en grandes cajas de regalo de lujo es uno de los retos más exigentes en el acabado de madera de alta gama. Cuanto mayor es la superficie, más difícil resulta mantener la uniformidad, la claridad y la profundidad sin introducir microburbujas.
Entonces, ¿qué pasos concretos pueden seguir los fabricantes para eliminar las burbujas y ofrecer ese acabado liso como el cristal que esperan los clientes de lujo?
En esta guía, le guiaré a través del proceso completo basado en años de trabajo práctico con proyectos de envases lacados de gran tamaño.
¿Por qué las superficies grandes son más propensas a las burbujas de aire durante la aplicación de la laca?
Las superficies grandes y planas exponen más superficie al aire, lo que aumenta las posibilidades de que el disolvente quede atrapado, la atomización sea desigual y se produzcan perturbaciones en el aire durante el secado.
Se necesita más tiempo para recubrir estas zonas de manera uniforme, y cuanto más tiempo permanezca abierta la laca, más posibilidades tendrá de atrapar partículas o burbujas en el aire.
Principales retos en superficies más grandes
- Horario ampliado1: La laca húmeda permanece expuesta más tiempo, lo que aumenta el riesgo de burbujas.
- Zonas de solapamiento2: Las líneas de pulverización pueden atrapar aire donde se cruzan los trazos.
- Fatiga del operador3: El movimiento incoherente de la mano provoca espesores desiguales y microespuma.
- Falta de uniformidad de ventilación: El flujo de aire puede alterar sólo una parte de la superficie, provocando un curado desigual.
Cuando trabajamos con cajas de más de 50 cm de ancho, siempre aplicamos la laca por secciones utilizando patrones de pulverización controlados con solapamientos programados, lo que ayuda a evitar la formación de espuma en el centro de la superficie.
¿Cómo reduce el riesgo de aire atrapado una preparación adecuada de la superficie?
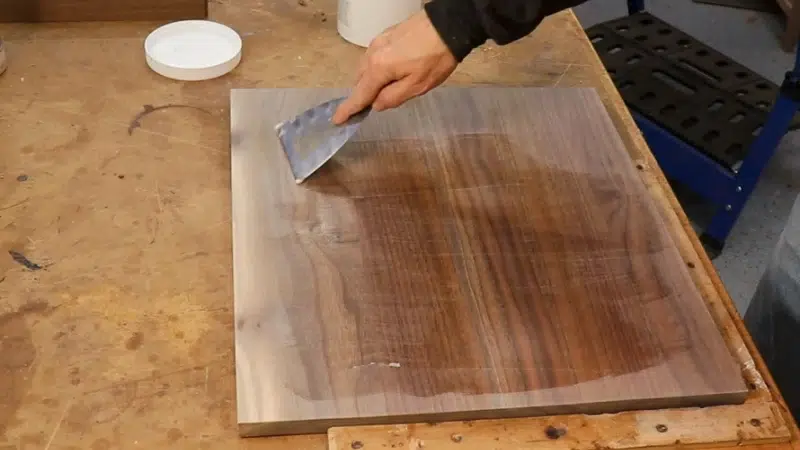
Una superficie porosa o mal sellada es una de las principales causas de las burbujas. La madera contiene de forma natural pequeñas bolsas de aire que se expanden cuando se cubre con laca rica en disolventes.
En el caso de las cajas grandes, incluso pequeñas inconsistencias en el sellado pueden provocar ampollas visibles o agujeros en el acabado final.
Pasos para preparar la superficie adecuadamente
-
Control de humedad
La madera no debe tener más de 10-12% contenido de humedad4. -
Relleno de cereales
Especialmente para maderas de grano abierto como el roble o el fresno. Utilice una masilla de alto contenido en sólidos para cerrar los poros. -
Aplicación de la capa selladora
Aplicar al menos 1-2 capas de sellador de lijado y curar completamente antes de lacar. -
Lijado inicial
Lije la superficie sellada con grano 400-600 para crear una base plana y no absorbente.
En los paneles más grandes, siempre trabajamos bajo luz rasante para asegurarnos de que no queden agujeros ni vetas abiertas antes de pasar a la laca.
¿Cuál es el ideal viscosidad y mezcla5 ¿método de lacado para evitar burbujas?
Una laca mal mezclada -o demasiado espesa- puede atrapar aire durante la pulverización o el cepillado. La viscosidad y la mezcla son absolutamente fundamentales para evitar la formación de espuma.
Proceso de mezcla ideal
-
Remover suavemente, no agitar
Remover lentamente con un movimiento en forma de ocho. La agitación introduce microburbujas. -
Dejar reposar la laca mixta
Después de removerlo, déjelo reposar de 15 a 30 minutos para que suelte el aire atrapado. -
Colar antes de usar
Pase siempre la laca por un filtro de nailon de malla 120-150 antes de verterla en el vaso pulverizador.
Viscosidad recomendada
| Tipo de laca | Viscosidad ideal (copa Zahn #2) |
|---|---|
| Nitrocelulosa | 18-22 segundos |
| Poliuretano | 20-25 segundos |
| Poliéster | 25-30 segundos |
Siempre ajustamos la viscosidad en función de la temperatura ambiente y del tamaño de la boquilla de la pistola. En climas cálidos, la laca más fina fluye mejor y destella más rápido, reduciendo el riesgo de burbujas.
¿Cómo influyen las herramientas de aplicación (pistolas pulverizadoras, brochas) en la formación de burbujas?
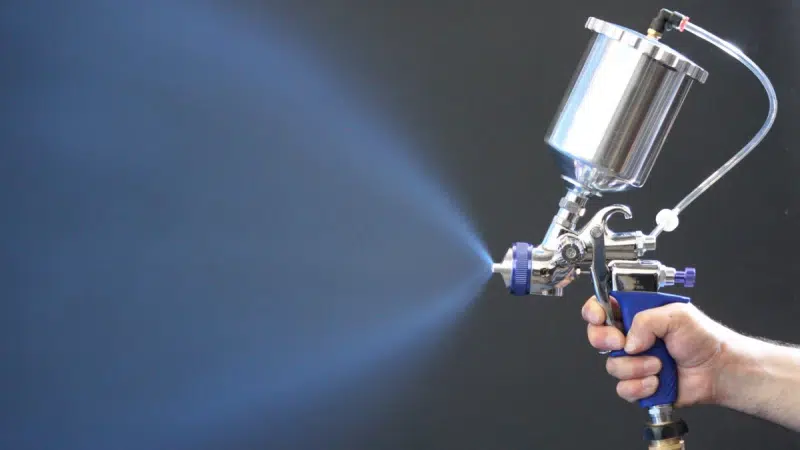
Una herramienta de aplicación inadecuada -o unos ajustes incorrectos- pueden provocar la pulverización de aire en la laca, creando pequeñas burbujas que sólo se hacen visibles después del curado.
Ajustes importantes de la pistola pulverizadora
✔ Tamaño de la punta del fluido
Para paneles grandes: 1,3-1,5 mm es lo ideal. Demasiado pequeño = sobreatomización; demasiado grande = piel de naranja.
✔ Presión atmosférica
Mantener dentro de 20-25 PSI para Pistolas HVLP6. Demasiado alto provoca turbulencias, demasiado bajo da una capa desigual.
✔ Anchura del ventilador
Utilice un patrón de abanico amplio y uniforme (20-25 cm) para reducir los solapamientos y encharcamientos.
✔ Distancia de pulverización
Mantener una distancia de 15-20 cm de la superficie, moviéndose a velocidad constante.
Cepillo Notas de aplicación
- Utilice cepillos de espuma o cerdas sintéticas7-Las cerdas naturales pueden atrapar el aire.
- Solicitar con trazos superpuestos en una sola dirección.
- Elimine inmediatamente las burbujas con una almohadilla de espuma.
Todos nuestros operarios de pulverización reciben una formación anual de calibración: utilizar una pistola mal afinada en un acabado de lujo es sencillamente inaceptable.
¿Qué controles ambientales ayudan a evitar el atrapamiento de aire durante el secado?
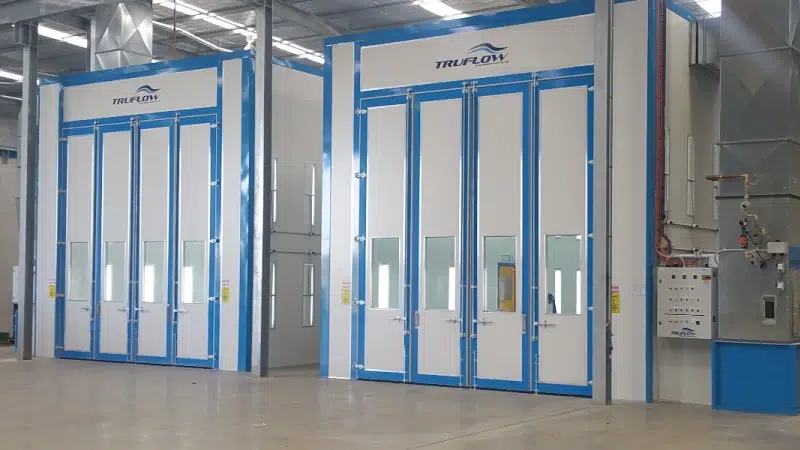
Una vez que la laca llega a la superficie, debe secarse uniforme y suavemente. Los ambientes incontrolados provocan flash-off de disolvente8 que atrapa el aire y la humedad dentro del acabado.
Entorno de secado ideal
| Factor | Gama ideal |
|---|---|
| Temperatura | 20-25°C (68-77°F) |
| Humedad relativa | 50-60% |
| Movimiento del aire | Flujo de aire filtrado y laminar |
| Tiempo de secado | 12-24 horas entre capas |
✔ Cabinas de pulverización de presión positiva9: Mantenga alejados el polvo y los residuos.
✔ Ventilación descendente10: Elimina los disolventes y el exceso de humedad sin alterar la superficie.
✔ Medidas de control estático: Evita la atracción de polvo y la inestabilidad del aire.
En verano, utilizamos filtros de aire adicionales y ralentizamos la producción para permitir la desgasificación total. Un curado rápido suele traducirse en un acabado blando o burbujeante.
¿Cómo puede lijado entre capas11 y curado lento12 mejorar la claridad de la superficie final?
Incluso con un spray limpio, microburbujas13 pueden formarse ocasionalmente. Un lijado adecuado entre capas y un curado controlado ayudan a eliminar los defectos y a crear ese acabado cristalino capa a capa.
Proceso de lijado en húmedo
- Utilice papel de lija resistente al agua de grano 800-1200.
- Lije con una ligera presión en líneas rectas, no en círculos.
- Aclarar con frecuencia y secar completamente antes de volver a aplicar la pintura.
Consejos de curado
✔ Deje pasar al menos 12 horas entre capas de laca fuerte
✔ Evitar el secado forzado a menos que se utilicen hornos de baja temperatura (≤45°C)
✔ Probar con la uña o con un medidor de brillo antes de la siguiente capa
Una de las mayores lecciones que he aprendido: nunca hay que precipitarse entre capa y capa. Dejar que la laca repose por completo es lo que permite que el aire atrapado salga de forma natural antes de que se vuelva permanente.
Conclusión
Aplicar laca de piano a cajas de regalo de lujo de gran tamaño exige algo más que habilidad para pulverizar: requiere un control científico de cada paso.
Para garantizar un acabado sin burbujas:
- Selle y nivele la madera antes de pulverizar.
- Mezclar la laca lentamente, ajustar la viscosidad y colar antes de usar.
- Utilice herramientas de pulverización calibradas y controle cuidadosamente el flujo de aire.
- Lijar suavemente y dejar curar completamente entre capa y capa.
Con paciencia, precisión y el entorno adecuado, incluso las grandes superficies lacadas pueden brillar como el cristal, reflejando no sólo la luz, sino la excelencia de su marca.
Marca: WoodoBox
Eslogan: Cajas de madera personalizadas, hechas a la perfección
Página web: www.woodobox.com
-
Comprender los efectos de un tiempo abierto prolongado puede ayudarle a mejorar sus técnicas de aplicación de la laca y evitar las burbujas de aire. ↩
-
Conocer las zonas de solapamiento puede mejorar su técnica de pulverización, garantizando un acabado más liso y menos imperfecciones. ↩
-
Explorar la relación entre la fatiga del operario y la calidad de la aplicación puede conducir a mejores prácticas y resultados en sus proyectos. ↩
-
Aprenda cómo influye el contenido de humedad en el acabado de la madera para conseguir un producto final impecable. ↩
-
Comprender la viscosidad y las técnicas de mezcla es crucial para conseguir un acabado liso y sin burbujas en las aplicaciones de laca. ↩
-
Comprender las pistolas HVLP puede ayudarle a optimizar su aplicación por pulverización y a reducir la formación de burbujas en los acabados. ↩
-
Explorar las ventajas de estos cepillos puede mejorar su técnica de aplicación y minimizar el atrapamiento de aire. ↩
-
Para conseguir un acabado perfecto, es fundamental conocer el efecto del disolvente. Explore este enlace para saber más sobre su impacto en los procesos de secado. ↩
-
Descubra cómo las cabinas de pulverización de presión positiva pueden mejorar su entorno de secado y la calidad del acabado. Haga clic para obtener más información. ↩
-
Aprenda cómo la ventilación Downdraft puede optimizar su proceso de secado y minimizar los defectos en los acabados. Este recurso tiene un valor incalculable para los profesionales. ↩
-
Explorar este recurso le proporcionará información sobre cómo el lijado mejora la calidad del acabado y la claridad de sus proyectos. ↩
-
Comprender el curado lento puede ayudarle a conseguir un acabado impecable al permitir la salida del aire y evitar defectos. ↩
-
Este enlace le ayudará a conocer las causas de las microburbujas y las técnicas de prevención eficaces para un acabado perfecto. ↩